TeamViewer IoT Raspberry Pi: The Ultimate Guide To Unlocking Remote Access Potential
So, you're probably wondering why TeamViewer IoT Raspberry Pi has become such a game-changer in the tech world. Picture this: you have a tiny little device sitting quietly in your corner, but it holds the power to connect your entire smart home setup. That's right, folks! With TeamViewer IoT Raspberry Pi, you're not just talking about remote access anymore; you're diving into a whole new level of connectivity that makes managing devices across the globe feel as easy as sending a text. This setup is like having a personal assistant that never sleeps, keeping everything running smoothly even when you're miles away.
Now, let’s get real for a second. If you've ever dealt with the frustration of not being able to troubleshoot a device remotely or felt limited by traditional remote access tools, this is where TeamViewer IoT steps in. Combined with the versatility of Raspberry Pi, you've got yourself a powerhouse duo. It's not just about convenience; it's about efficiency, scalability, and security all wrapped up into one neat package. Trust me, once you get a taste of what this setup can do, there's no going back.
But before we dive deep into the nitty-gritty, let’s clear the air. This guide isn’t just another tech tutorial. It’s a comprehensive, step-by-step walkthrough designed to help you harness the full potential of TeamViewer IoT Raspberry Pi. Whether you’re a tech enthusiast looking to expand your knowledge or a beginner trying to dip your toes into the world of IoT, this guide has got your back. Let’s roll!
What Exactly is TeamViewer IoT?
Alright, let’s break it down. TeamViewer IoT isn’t your average remote access software. It’s a cutting-edge solution designed specifically for Internet of Things (IoT) applications. Think of it as a bridge that connects your devices, no matter where they are in the world. With TeamViewer IoT, you can monitor, manage, and control IoT devices without the hassle of complicated setups or firewalls. It’s like having a remote control for your entire smart home or office ecosystem.
Here’s the kicker: TeamViewer IoT isn’t just about accessing devices. It’s about doing it securely. The software employs military-grade encryption to ensure your data stays protected while giving you the flexibility to manage your devices from anywhere. And let’s not forget the user-friendly interface. Even if you’re not a tech wizard, you’ll find it easy to navigate and set up. Plus, it integrates seamlessly with various platforms, making it a versatile choice for both personal and professional use.
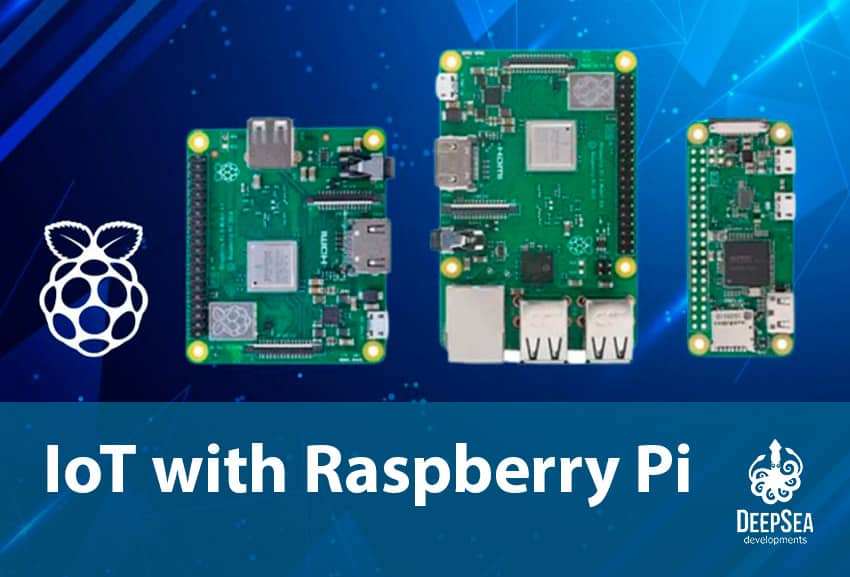
Why Raspberry Pi is Perfect for TeamViewer IoT
Raspberry Pi might be small, but it packs a punch. This single-board computer is incredibly versatile and affordable, making it an ideal partner for TeamViewer IoT. Imagine having a device that can handle complex tasks like running IoT applications, yet fits in the palm of your hand. That’s Raspberry Pi for you. Its compatibility with a wide range of operating systems and software makes it a top choice for developers and hobbyists alike.
But what really sets Raspberry Pi apart is its ability to act as a central hub for IoT devices. When paired with TeamViewer IoT, it becomes a powerhouse for managing everything from smart lights to industrial machinery. Plus, its open-source nature means you can customize it to suit your specific needs. Whether you’re building a smart home or a smart factory, Raspberry Pi has got you covered.
Setting Up TeamViewer IoT on Raspberry Pi
Setting up TeamViewer IoT on Raspberry Pi might sound intimidating, but trust me, it’s simpler than you think. First things first, you’ll need to install the TeamViewer IoT software on your Raspberry Pi. This can be done by following the straightforward instructions provided on the official TeamViewer website. Once installed, you’ll need to connect your Raspberry Pi to the internet. This is crucial because TeamViewer IoT relies on a stable internet connection to function properly.
Next, log in to your TeamViewer account and add your Raspberry Pi as a device. This will allow you to access it remotely from anywhere in the world. Make sure to configure the settings according to your preferences. For example, you can set up automatic updates to ensure your device is always running the latest software. Don’t forget to test the setup to ensure everything is working as expected. It’s always better to catch any issues early on.
Key Features of TeamViewer IoT Raspberry Pi
Let’s talk about the features that make TeamViewer IoT Raspberry Pi a must-have for anyone serious about IoT. First up, we have the ability to manage multiple devices from a single interface. This means you can control everything from your smart thermostat to your security cameras with just a few clicks. Plus, the real-time monitoring feature allows you to keep an eye on your devices at all times, ensuring they’re functioning as they should.
Another standout feature is the remote maintenance option. Let’s say one of your IoT devices is acting up. Instead of physically going to the location, you can troubleshoot the issue remotely, saving you time and effort. And let’s not forget the security features. With TeamViewer IoT, you can rest assured knowing your data is protected by top-notch encryption. It’s like having a digital fortress guarding your devices.
Applications of TeamViewer IoT Raspberry Pi
The applications of TeamViewer IoT Raspberry Pi are as diverse as they are exciting. For starters, it’s perfect for smart home automation. Imagine being able to adjust your home’s lighting, temperature, and security systems from your phone while you’re on vacation. It’s like having a personal butler at your disposal. But that’s just the beginning. TeamViewer IoT Raspberry Pi is also widely used in industrial settings for monitoring and managing machinery.
In the healthcare sector, it’s being used to remotely monitor medical devices, ensuring patients receive the care they need without the need for physical intervention. And in the retail industry, it’s helping businesses manage inventory and point-of-sale systems more efficiently. The possibilities are endless, and as technology continues to evolve, so too will the applications of TeamViewer IoT Raspberry Pi.
Benefits of Using TeamViewer IoT Raspberry Pi
So, what’s in it for you? The benefits of using TeamViewer IoT Raspberry Pi are numerous. For one, it offers unparalleled convenience. No longer do you have to be physically present to manage your devices. With just a few taps on your smartphone or computer, you can control everything from anywhere in the world. This level of flexibility is a game-changer for both personal and professional use.
Another major benefit is cost-effectiveness. Traditional remote access solutions can be expensive, but with TeamViewer IoT Raspberry Pi, you get top-tier functionality at a fraction of the cost. Plus, the open-source nature of Raspberry Pi means you can customize it to suit your specific needs without breaking the bank. And let’s not forget the security benefits. With TeamViewer IoT, you can rest assured knowing your data is safe and secure.
Common Challenges and Solutions
Of course, no technology is without its challenges. One common issue users face with TeamViewer IoT Raspberry Pi is connectivity problems. This can usually be resolved by ensuring a stable internet connection and configuring the network settings correctly. Another challenge is compatibility issues with certain devices. To overcome this, make sure all your devices are compatible with TeamViewer IoT before setting up.
Security concerns are also a common worry. While TeamViewer IoT employs top-notch encryption, it’s always a good idea to implement additional security measures, such as strong passwords and two-factor authentication. Regularly updating your software and firmware can also help mitigate potential security risks. And if you ever run into any issues, TeamViewer’s support team is just a call away.
Tips for Maximizing TeamViewer IoT Raspberry Pi
Here are a few tips to help you get the most out of your TeamViewer IoT Raspberry Pi setup. First, make sure to optimize your network settings for the best performance. This includes setting up a dedicated network for your IoT devices if possible. Next, regularly back up your data to prevent any potential losses. You’d be surprised how many people neglect this crucial step.
Another tip is to automate as many tasks as possible. This not only saves you time but also ensures your devices are always running smoothly. And don’t forget to explore the various plugins and extensions available for TeamViewer IoT. They can add extra functionality and customization options to your setup, making it even more powerful.
Future Trends in TeamViewer IoT Raspberry Pi
The future of TeamViewer IoT Raspberry Pi looks brighter than ever. As IoT technology continues to evolve, we can expect even more advanced features and capabilities. For instance, we might see more integration with AI and machine learning, allowing for smarter and more autonomous device management. Plus, with the rise of 5G technology, we can expect faster and more reliable connections, making remote access even more seamless.
Another trend to watch out for is the increasing focus on cybersecurity. As more devices become connected, the need for robust security measures becomes even more critical. Expect to see TeamViewer IoT incorporating even more advanced encryption and security protocols in the coming years. And let’s not forget the growing demand for sustainable technology. We might see more energy-efficient solutions that not only save costs but also help protect the environment.
Expert Insights and Recommendations
According to industry experts, the key to success with TeamViewer IoT Raspberry Pi lies in proper planning and execution. Start by identifying your specific needs and goals. This will help you determine the best setup and configuration for your situation. Next, invest in quality hardware and software. While Raspberry Pi is affordable, skimping on other components can lead to performance issues down the line.
Also, don’t underestimate the importance of training and education. Whether you’re setting up a smart home or managing an entire network of IoT devices, having a solid understanding of the technology will make the process smoother and more efficient. And finally, stay updated with the latest trends and developments in the IoT space. Technology is constantly evolving, and staying ahead of the curve can give you a significant advantage.
Conclusion: Take Action Today
And there you have it, folks! TeamViewer IoT Raspberry Pi is more than just a tool; it’s a gateway to a smarter, more connected world. From its ease of use to its advanced features and security measures, it’s clear why so many people are turning to this setup for their IoT needs. Whether you’re looking to automate your smart home or manage industrial machinery, TeamViewer IoT Raspberry Pi has got you covered.
So, what are you waiting for? Dive into the world of IoT and experience the freedom and flexibility that TeamViewer IoT Raspberry Pi offers. Don’t forget to share your thoughts and experiences in the comments below. And if you found this guide helpful, be sure to check out our other articles for more tech tips and tricks. Let’s connect and build a smarter future together!
Table of Contents
- What Exactly is TeamViewer IoT?
- Why Raspberry Pi is Perfect for TeamViewer IoT
- Setting Up TeamViewer IoT on Raspberry Pi
- Key Features of TeamViewer IoT Raspberry Pi
- Applications of TeamViewer IoT Raspberry Pi
- Benefits of Using TeamViewer IoT Raspberry Pi
- Common Challenges and Solutions
- Tips for Maximizing TeamViewer IoT Raspberry Pi
- Future Trends in TeamViewer IoT Raspberry Pi
- Expert Insights and Recommendations


