How To Use RemoteIoT Behind Firewall On Mac Without Stress
Imagine this—you're sitting at your desk, ready to dive into the world of IoT (Internet of Things) on your trusty Mac, but there's this pesky firewall blocking your way. It's like trying to sneak into a VIP party without an invite. But don’t sweat it, because today, we're gonna teach you how to use RemoteIoT behind a firewall on your Mac without losing your cool.
Firewalls are like bouncers at clubs—they decide what gets in and what stays out. While they’re super important for security, they can sometimes make life tricky when you're trying to access certain tools or services. RemoteIoT is one of those tools that can be a bit finicky when you're behind a firewall. But hey, we’re here to help you out, so buckle up for some serious tech talk.
By the end of this guide, you'll have all the info you need to get RemoteIoT running smoothly on your Mac, even if you're behind a firewall. Whether you're a beginner or a seasoned pro, this article has got your back. Let’s dive right in, shall we?
Here's a quick overview of what we'll cover:
- Understanding firewalls and why they matter
- What is RemoteIoT and why it’s useful
- How to configure your Mac for RemoteIoT
- Tips for troubleshooting common issues
- Security best practices to keep your setup safe
Understanding Firewalls and Their Role
Before we jump into the nitty-gritty of RemoteIoT, let’s talk about firewalls. A firewall is like a digital security guard—it monitors and controls incoming and outgoing network traffic based on predetermined security rules. It’s there to protect your system from unauthorized access, but sometimes it can block legit stuff too.
There are different types of firewalls, but the one we’re focusing on here is the software firewall that comes pre-installed on your Mac. It’s pretty good at its job, but it can get in the way when you're trying to use certain apps or services that need external connections.
Now, why does this matter for RemoteIoT? Well, RemoteIoT relies on being able to connect to external servers or devices, and if your firewall is too strict, it might block those connections. So, we need to figure out how to work around it without compromising your security.
Types of Firewalls
Just so you know, there are a few different types of firewalls out there:
- Software firewalls (like the one on your Mac)
- Hardware firewalls (usually found in routers)
- Cloud-based firewalls
For this guide, we’re gonna focus on the software firewall on your Mac, but some of the tips can apply to other types as well.
What is RemoteIoT and Why Should You Care?
RemoteIoT is basically a tool that lets you control and monitor IoT devices from anywhere. Whether you’re managing smart home gadgets, industrial sensors, or any other connected device, RemoteIoT makes it easy to stay on top of things.
But here’s the thing—IoT devices often need to communicate with external servers, and that’s where firewalls can become a problem. If your firewall blocks those connections, you won’t be able to use RemoteIoT properly. That’s why we need to figure out how to configure everything so it works seamlessly.
So, why should you care about RemoteIoT? Well, if you’re into IoT, it’s a game-changer. It gives you the ability to manage your devices remotely, which is especially useful if you’re working on projects that require constant monitoring or adjustments.
Benefits of Using RemoteIoT
Here are some of the key benefits of using RemoteIoT:
- Remote control of IoT devices
- Real-time monitoring and alerts
- Easy integration with other systems
- Improved efficiency and productivity
As you can see, RemoteIoT has a lot to offer, but we need to make sure it plays nice with your firewall. Let’s move on to the next step.
Configuring Your Mac for RemoteIoT
Alright, now it’s time to get down to business. Configuring your Mac for RemoteIoT involves a few steps, but don’t worry—it’s not as complicated as it sounds. We’ll walk you through the process step by step.
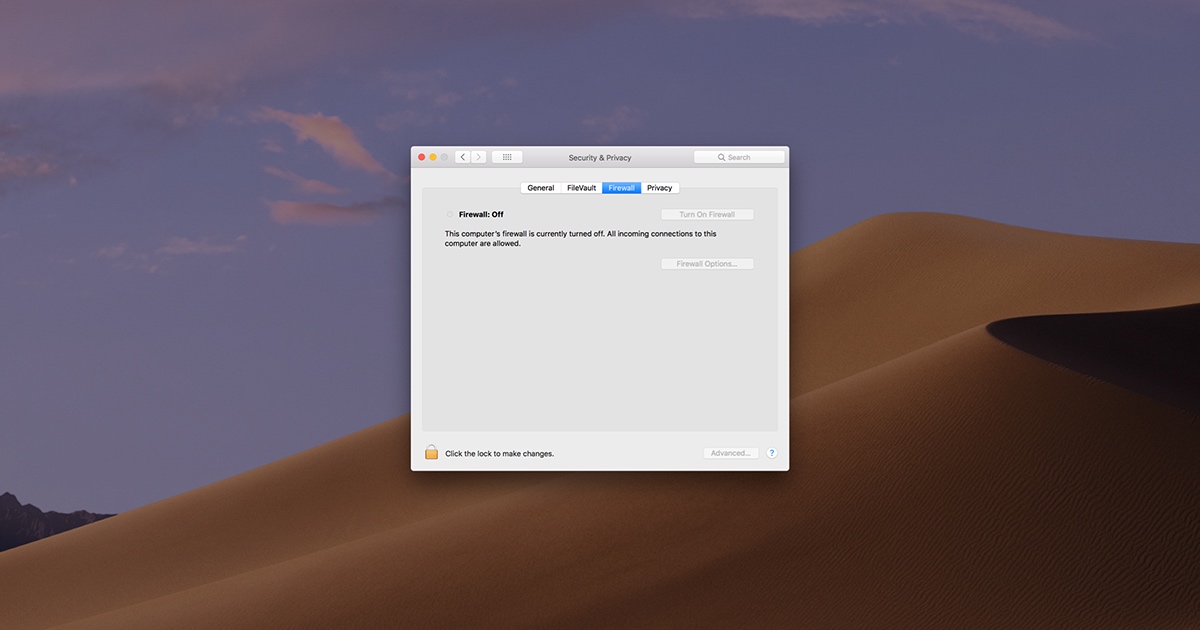
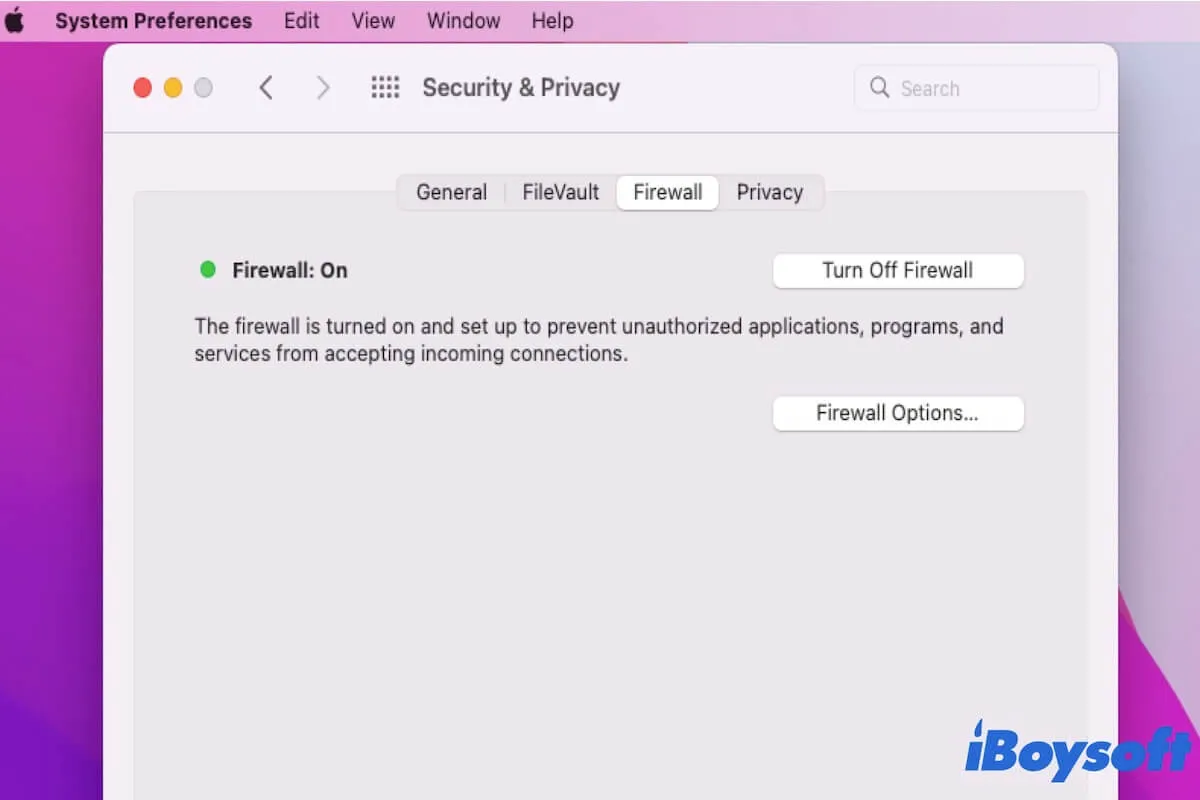
Step 1: Check Your Firewall Settings
First things first, you need to check your firewall settings on your Mac. Here’s how:
- Go to System Preferences
- Click on Security & Privacy
- Select the Firewall tab
- Click on Firewall Options
In the Firewall Options window, you’ll see a list of apps and services that are allowed to receive incoming connections. If RemoteIoT isn’t on the list, you’ll need to add it.
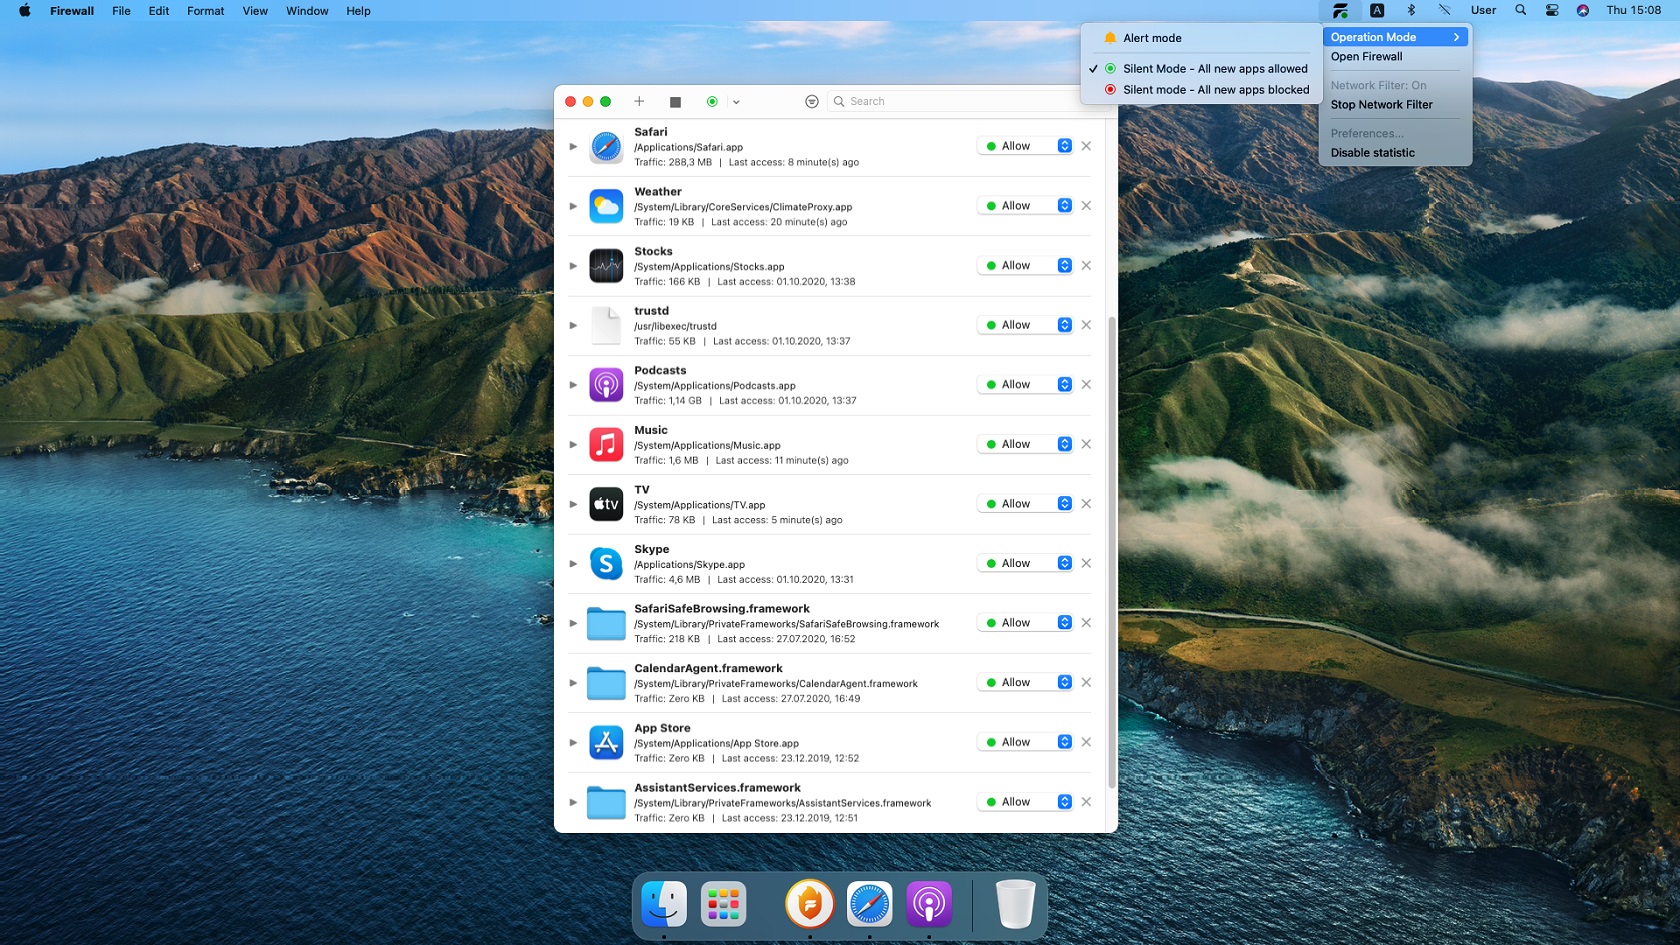
Step 2: Add RemoteIoT to the Firewall
To add RemoteIoT to your firewall settings, follow these steps:
- Click the lock icon in the bottom left corner and enter your password
- Click the + button to add a new app
- Navigate to the RemoteIoT app and select it
- Click Add
Once RemoteIoT is added to the list, it should be allowed to receive incoming connections. Easy peasy, right?
Step 3: Test Your Connection
Now that you’ve configured your firewall, it’s time to test your connection. Open up RemoteIoT and try to connect to one of your devices. If everything is set up correctly, you should be good to go.
If you’re still having issues, don’t panic—we’ll cover troubleshooting in the next section.
Troubleshooting Common Issues
Even after configuring your firewall, you might run into some issues. Here are a few common problems and how to fix them:
Problem 1: Connection Timeout
If you’re getting a connection timeout error, it could be due to a few different things. First, double-check your firewall settings to make sure RemoteIoT is allowed. If that doesn’t work, try restarting your router and modem. Sometimes a simple reboot can fix the issue.
Problem 2: Blocked Ports
RemoteIoT might be using specific ports that are blocked by your firewall. You can try opening those ports manually, but be careful—opening too many ports can compromise your security.
Problem 3: Incorrect IP Address
Make sure you’re using the correct IP address for your device. If you’re not sure, check the device’s manual or contact the manufacturer for assistance.
Security Best Practices
While it’s important to get RemoteIoT working behind your firewall, you also need to make sure your setup is secure. Here are a few tips to help you stay safe:
Tip 1: Use Strong Passwords
Always use strong, unique passwords for your IoT devices and RemoteIoT account. Avoid using easily guessable info like your name or birthdate.
Tip 2: Enable Two-Factor Authentication
Two-factor authentication adds an extra layer of security to your account. Even if someone gets your password, they won’t be able to access your account without the second factor.
Tip 3: Keep Your Software Up to Date
Make sure you’re running the latest version of RemoteIoT and any other software on your Mac. Updates often include important security patches that can protect you from potential threats.
Advanced Configuration Options
If you’re comfortable with more advanced settings, there are a few other things you can do to optimize your RemoteIoT setup:
Option 1: Use a Proxy Server
A proxy server can help you bypass firewall restrictions by routing your traffic through a different server. This can be especially useful if you’re working in a corporate environment with strict firewall rules.
Option 2: Configure Port Forwarding
Port forwarding allows you to direct incoming traffic to a specific device on your network. This can be useful if you’re trying to access a specific IoT device from outside your local network.
Conclusion
And there you have it—a comprehensive guide on how to use RemoteIoT behind a firewall on your Mac. By following the steps we’ve outlined, you should be able to get everything up and running without too much hassle.
Remember, firewalls are there to protect you, so don’t disable them completely just to make things easier. Instead, take the time to configure them properly so you can enjoy the benefits of RemoteIoT while staying secure.
So, what are you waiting for? Go ahead and give it a try. And if you have any questions or run into any issues, feel free to leave a comment below. We’d love to hear from you!
References
Here are some sources we used to put together this guide:

 on your trusty Mac, but there's this pesky firewall blockin)