How To Draw A Giraffe: A Step-by-Step Guide For Artists Of All Levels
Ever wondered how to draw a giraffe that looks both cute and realistic? If you’ve been searching for a way to bring this majestic creature to life on paper, you’re in the right place. Drawing a giraffe might seem intimidating at first, but with the right techniques and a bit of practice, anyone can master it. Whether you're a beginner or a seasoned artist, this guide will walk you through every step, from sketching the basic shapes to adding those iconic spots.
Let’s face it—giraffes are pretty cool. They’re not just the tallest land animals; they’re also symbols of elegance and grace. But drawing them can be tricky because of their long necks, unique patterns, and overall structure. Don’t worry, though! By breaking down the process into manageable chunks, we’ll make it as easy as pie.
In this article, we’ll cover everything you need to know about how to draw a giraffe. From understanding its anatomy to perfecting those funky spots, we’ve got you covered. So grab your pencils, erasers, and a blank sheet of paper, and let’s dive right in!
Table of Contents
- Understanding Giraffe Anatomy
- Basic Sketch: Starting with Shapes
- Drawing the Neck and Head
- Creating the Body Outline
- Adding Legs and Feet
- Designing the Spot Patterns
- Shading Techniques for Depth
- Finalizing Details
- Tips and Tricks for Beginners
- Conclusion: Your Artistic Journey Starts Here
Understanding Giraffe Anatomy
Before we jump into drawing, it’s important to understand what makes a giraffe… well, a giraffe. Anatomy plays a huge role in creating a believable and proportional drawing. Think of it like building a house—you need a solid foundation before adding the roof.
A giraffe’s body is made up of several key parts:
- Head: Small compared to the rest of the body, with two small horns called ossicones.
- Neck: The most distinctive feature, accounting for about half the giraffe’s height.
- Body: Large and muscular, with a sloping back that gives the giraffe its unique silhouette.
- Legs: Long and strong, designed for running and kicking predators.
- Tail: Thin and long, ending with a tuft of hair.
By studying these features, you’ll have a better idea of how to proportion your drawing correctly. Remember, practice makes perfect, so don’t be afraid to sketch multiple versions until you get it right.
Basic Sketch: Starting with Shapes
Step 1: Draw the Body
Begin by sketching an oval for the giraffe’s body. This will serve as the foundation for everything else. Keep in mind that the body should be slightly larger than you might expect, especially if you’re used to drawing animals with smaller torsos.
Step 2: Add the Neck
Now, draw a long, curved line extending upward from the top of the oval. This will become the giraffe’s neck. Make sure the curve is gentle and natural—no sharp angles here!
Pro tip: Imagine the neck as a graceful arc. It might help to visualize a question mark shape to guide your line.
Drawing the Neck and Head
Once you’ve got the basic shape of the neck, it’s time to focus on the head. Start by adding a small circle at the top of the neck. Then, sketch in the ears, eyes, and ossicones. These little details will give your giraffe character and personality.
- Ears: Draw two triangular shapes on top of the head.
- Eyes: Place them near the middle of the head, slightly tilted upward.
- Ossicones: These are the giraffe’s signature horns. Sketch them as small, rounded bumps.
Remember, the head should look proportionate to the neck. Too large, and it’ll throw off the balance of your drawing.
Creating the Body Outline
With the neck and head in place, it’s time to refine the body outline. Use the initial oval as a guide, but feel free to adjust it as needed. Add curves to show muscle definition and movement, making the giraffe look dynamic rather than stiff.
Here’s a quick checklist to ensure your body looks realistic:
- Make the back slope downward toward the tail.
- Add a slight curve to the belly to give it dimension.
- Don’t forget to sketch in the shoulders—they’re an essential part of the giraffe’s powerful frame.
Adding Legs and Feet
Step 1: Sketch the Legs
Giraffes have four long legs, so let’s tackle those next. Draw two vertical lines extending downward from the body for the front legs, and repeat the process for the back legs. Make sure the front legs are slightly thicker than the back ones.
Step 2: Define the Feet
At the bottom of each leg, add small rectangles to represent the hooves. These don’t need to be overly detailed, but they’ll add authenticity to your drawing.
Fun fact: Giraffes use their powerful legs for defense. A single kick from a giraffe can send a lion flying!
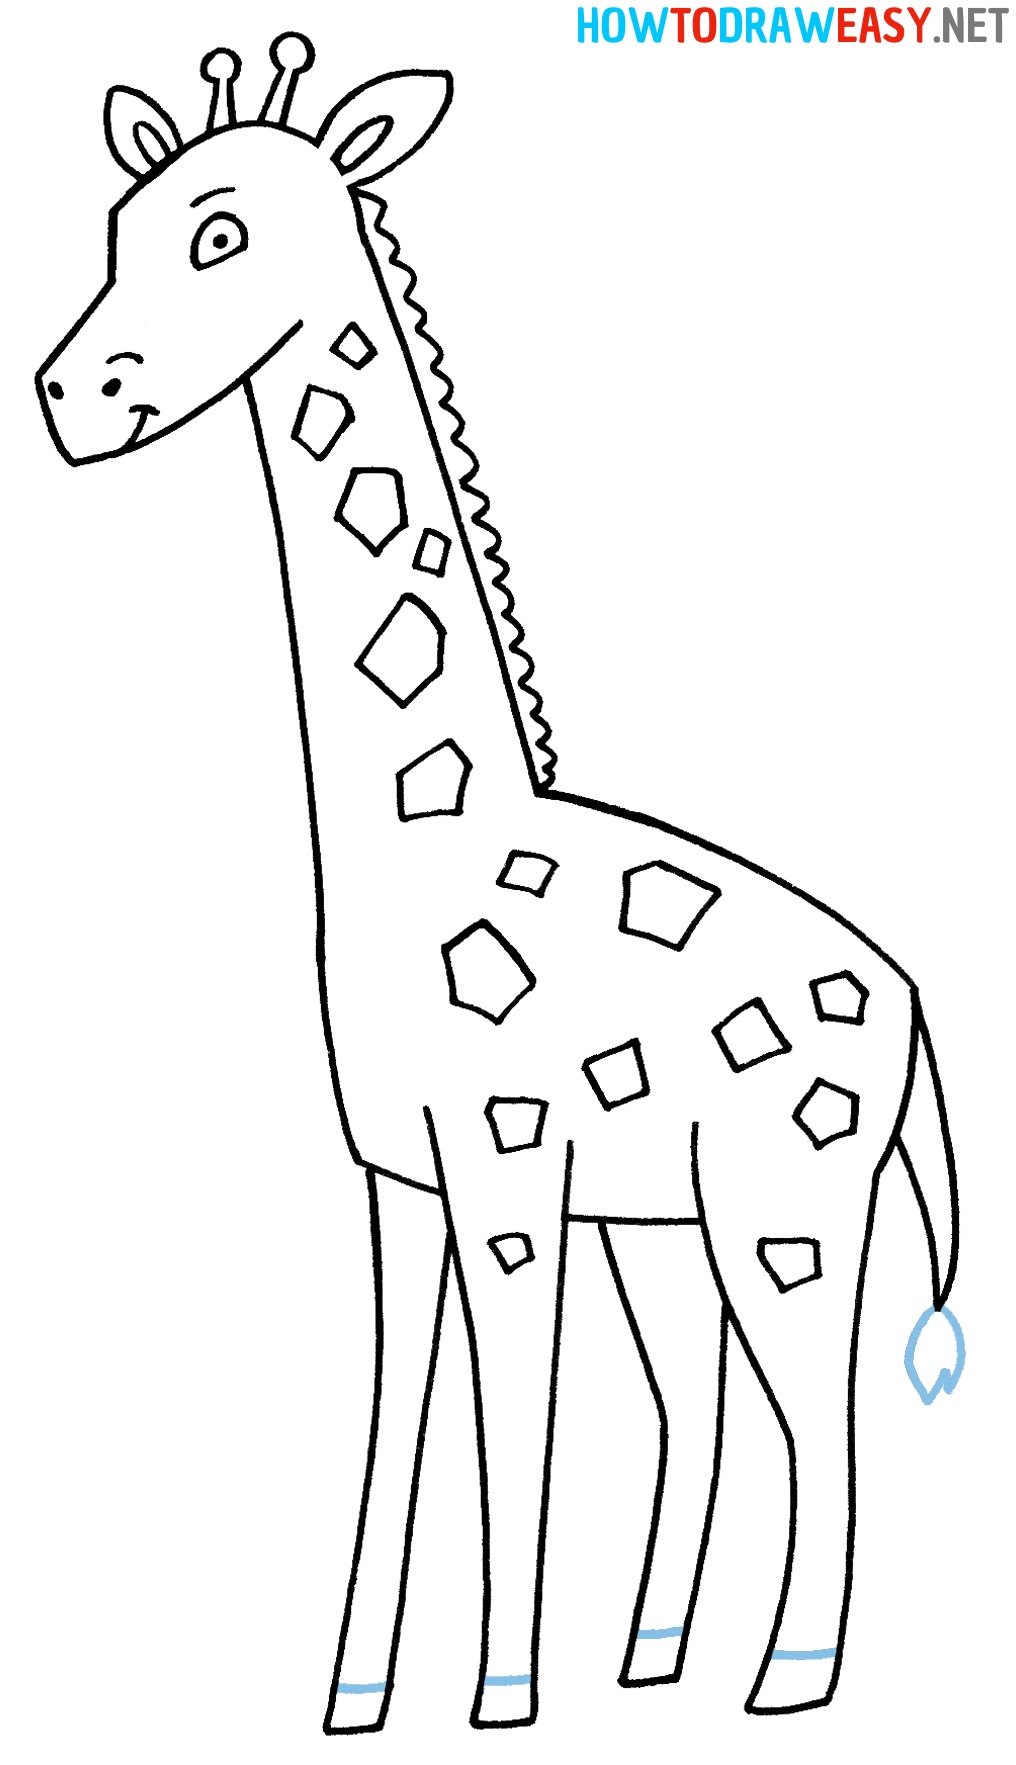
Designing the Spot Patterns
No giraffe drawing is complete without those iconic spots. Start by sketching irregular shapes all over the body, varying in size and shape. Each giraffe has a unique pattern, so feel free to get creative with yours.
Here’s a trick to make your spots look more natural:
- Use a mix of dark and light shades to create depth.
- Overlap some spots to give the illusion of texture.
- Leave some areas blank to mimic the giraffe’s lighter fur.
These patterns aren’t just for looks—they help giraffes blend into their environment and avoid predators.
Shading Techniques for Depth
Shading is what brings your drawing to life. Use a pencil or blending tool to add shadows and highlights, emphasizing the giraffe’s muscles and contours.
Focus on these areas:
- Underneath the neck and belly for a shadowed effect.
- Along the sides of the legs to show their length.
- Around the eyes to give them depth.
Remember, less is often more when it comes to shading. Start light and gradually build up the darkness until you achieve the desired effect.
Finalizing Details
Now that the main structure is complete, it’s time to add the finishing touches. Go over your lines with a finer pencil to make them crisp and clean. Erase any unnecessary guidelines and refine the edges of the spots.
Don’t forget to add the tail! Draw a thin line extending from the back of the giraffe, ending with a tuft of hair. It might seem small, but it adds a lot to the overall look.
Tips and Tricks for Beginners
Learning how to draw a giraffe takes time and patience. Here are a few tips to help you along the way:
- Study real giraffes. Look at photos or videos to understand their movements and proportions.
- Practice sketching basic shapes. Mastering circles, ovals, and lines will make complex drawings easier.
- Experiment with different mediums. Try colored pencils, markers, or even digital tools to see what works best for you.
- Don’t be afraid to make mistakes. Every great artist started as a beginner.
And remember, art is all about self-expression. Your giraffe doesn’t have to look exactly like a real one—it just needs to reflect your unique style.
Conclusion: Your Artistic Journey Starts Here
By now, you should have a pretty good idea of how to draw a giraffe. From understanding its anatomy to perfecting those spots, you’ve covered all the basics. But the journey doesn’t stop here. Keep practicing, keep exploring, and most importantly, keep having fun!
If you enjoyed this guide, why not try drawing other animals? The world is full of fascinating creatures waiting to be brought to life on paper. And hey, don’t forget to share your creations with the world. Who knows? You might inspire someone else to pick up a pencil and start their own artistic adventure.
So go ahead, grab your supplies, and let your imagination run wild. After all, the only limit is your creativity!


