How To Remove Popcorn Ceiling: A Step-by-Step Guide You Can Trust
So you’ve finally decided to tackle that pesky popcorn ceiling in your home right yeah? Let’s be honest that texture might’ve been cool back in the day but now it just screams outdated vibes. Removing a popcorn ceiling can transform any room into a sleek modern space that screams “I’m living the dream.” But hold up before you grab your tools let’s dive into how to remove popcorn ceiling the right way so you don’t end up in DIY disaster mode.
Here’s the deal: popcorn ceilings were super popular back in the day because they were great for hiding imperfections and reducing noise. But these days they just don’t cut it. Plus they can contain asbestos which makes things a little more complicated. Don’t sweat it though—we’ve got you covered with all the info you need to safely and effectively remove that popcorn texture.
Removing popcorn ceilings is one of those projects that can seem intimidating at first but with the right steps and tools it’s totally doable even for DIY beginners. Stick around because we’re about to break it all down step by step so you can turn that outdated ceiling into something you’ll actually want to look at.
Why Remove Popcorn Ceiling?
Before we dive into the nitty-gritty let’s talk about why you might want to remove your popcorn ceiling in the first place. Sure it’s not the most attractive feature in your home but there’s more to it than just aesthetics. Here are a few reasons why removing popcorn ceilings can be a game-changer:
- Aesthetic Upgrade: Let’s face it popcorn ceilings scream 1970s. Removing them gives your home a modern clean look that’s way more appealing.
- Ease of Cleaning: Popcorn ceilings are dust magnets. They collect dirt and grime over time making them a pain to clean. A smooth ceiling? Much easier to maintain.
- Increased Property Value: If you’re thinking of selling your home anytime soon a smooth ceiling can boost its appeal to potential buyers. People love clean lines and modern finishes.
- Safety Concerns: Asbestos—a nasty carcinogen—was commonly used in popcorn ceilings before the 1980s. If your home was built during that era testing for asbestos is a must.
Now that you know why removing popcorn ceilings is worth it let’s move on to the good stuff: how to do it!
What You’ll Need to Remove Popcorn Ceiling
Before you start smashing away you’ll need to gather the right tools and materials. Trust me you don’t want to be halfway through this project only to realize you’re missing something crucial. Here’s what you’ll need:
Tools and Materials
- Protective gear (safety goggles dust mask gloves)
- Plastic sheeting or drop cloths
- Utility knife or scraper
- Spray bottle with water or a commercial popcorn ceiling remover
- Putty knife or drywall knife
- Sanding block or pole sander (optional)
- Joint compound or drywall mud
- Paint and primer
Make sure you have everything on hand before you start. Safety gear is non-negotiable especially if you suspect your ceiling contains asbestos. Now let’s get into the actual process.
Step-by-Step Guide: How to Remove Popcorn Ceiling
Alright let’s break down the process into manageable steps so you can tackle this project like a pro.
Step 1: Test for Asbestos
This is the most crucial step especially if your home was built before the 1980s. Asbestos is a serious health hazard so you need to know whether it’s lurking in your ceiling. Here’s what you do:
- Wear protective gear including a dust mask gloves and goggles.
- Use a utility knife to carefully remove a small sample of the ceiling texture.
- Place the sample in a ziplock bag and send it to a certified lab for testing.
If the test comes back positive you’ll need to hire a professional asbestos abatement team. Don’t mess around with asbestos—it’s not worth the risk.
Step 2: Prepare the Room
Once you’ve confirmed your ceiling is asbestos-free it’s time to prep the room. Here’s how:
- Cover the floor and furniture with plastic sheeting or drop cloths.
- Remove any fixtures like light fixtures ceiling fans or smoke detectors.
- Turn off your HVAC system to prevent dust from spreading through the vents.
Pro tip: Use painter’s tape to seal off doorways and vents to keep dust contained.
Step 3: Wet the Ceiling
Wetting the popcorn texture makes it easier to remove and reduces dust. Here’s what you do:
- Fill a spray bottle with water or a commercial popcorn ceiling remover.
- Lightly mist the ceiling allowing the solution to soak in for a few minutes.
Don’t over-saturate the ceiling or you could damage the drywall underneath. A light misting should do the trick.
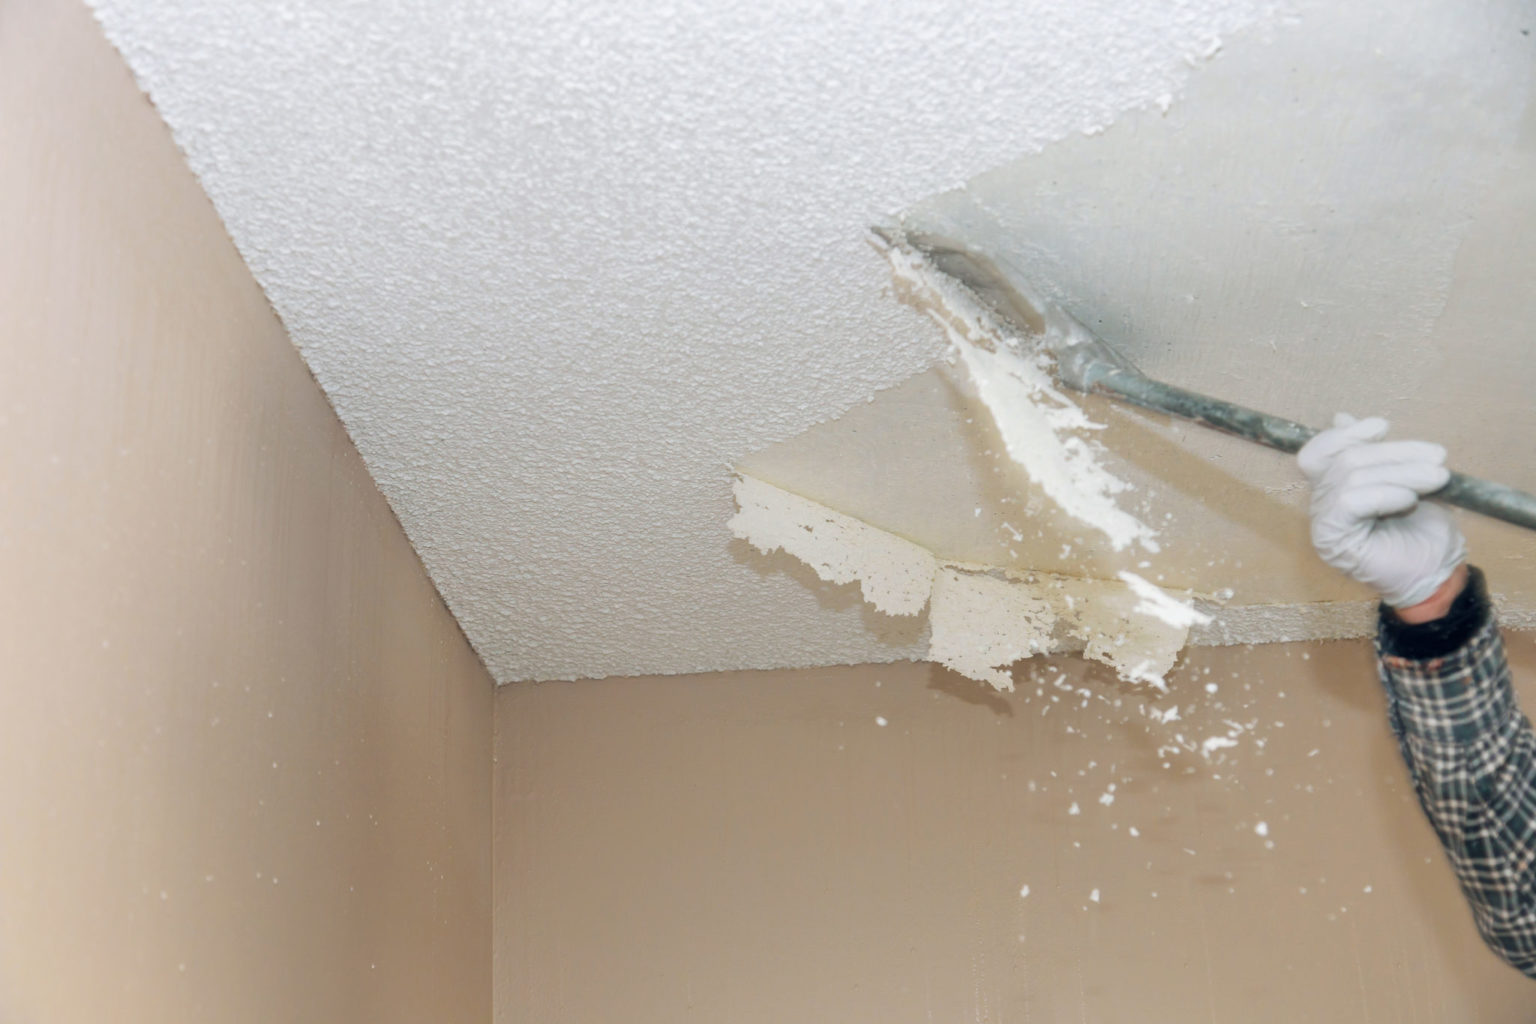
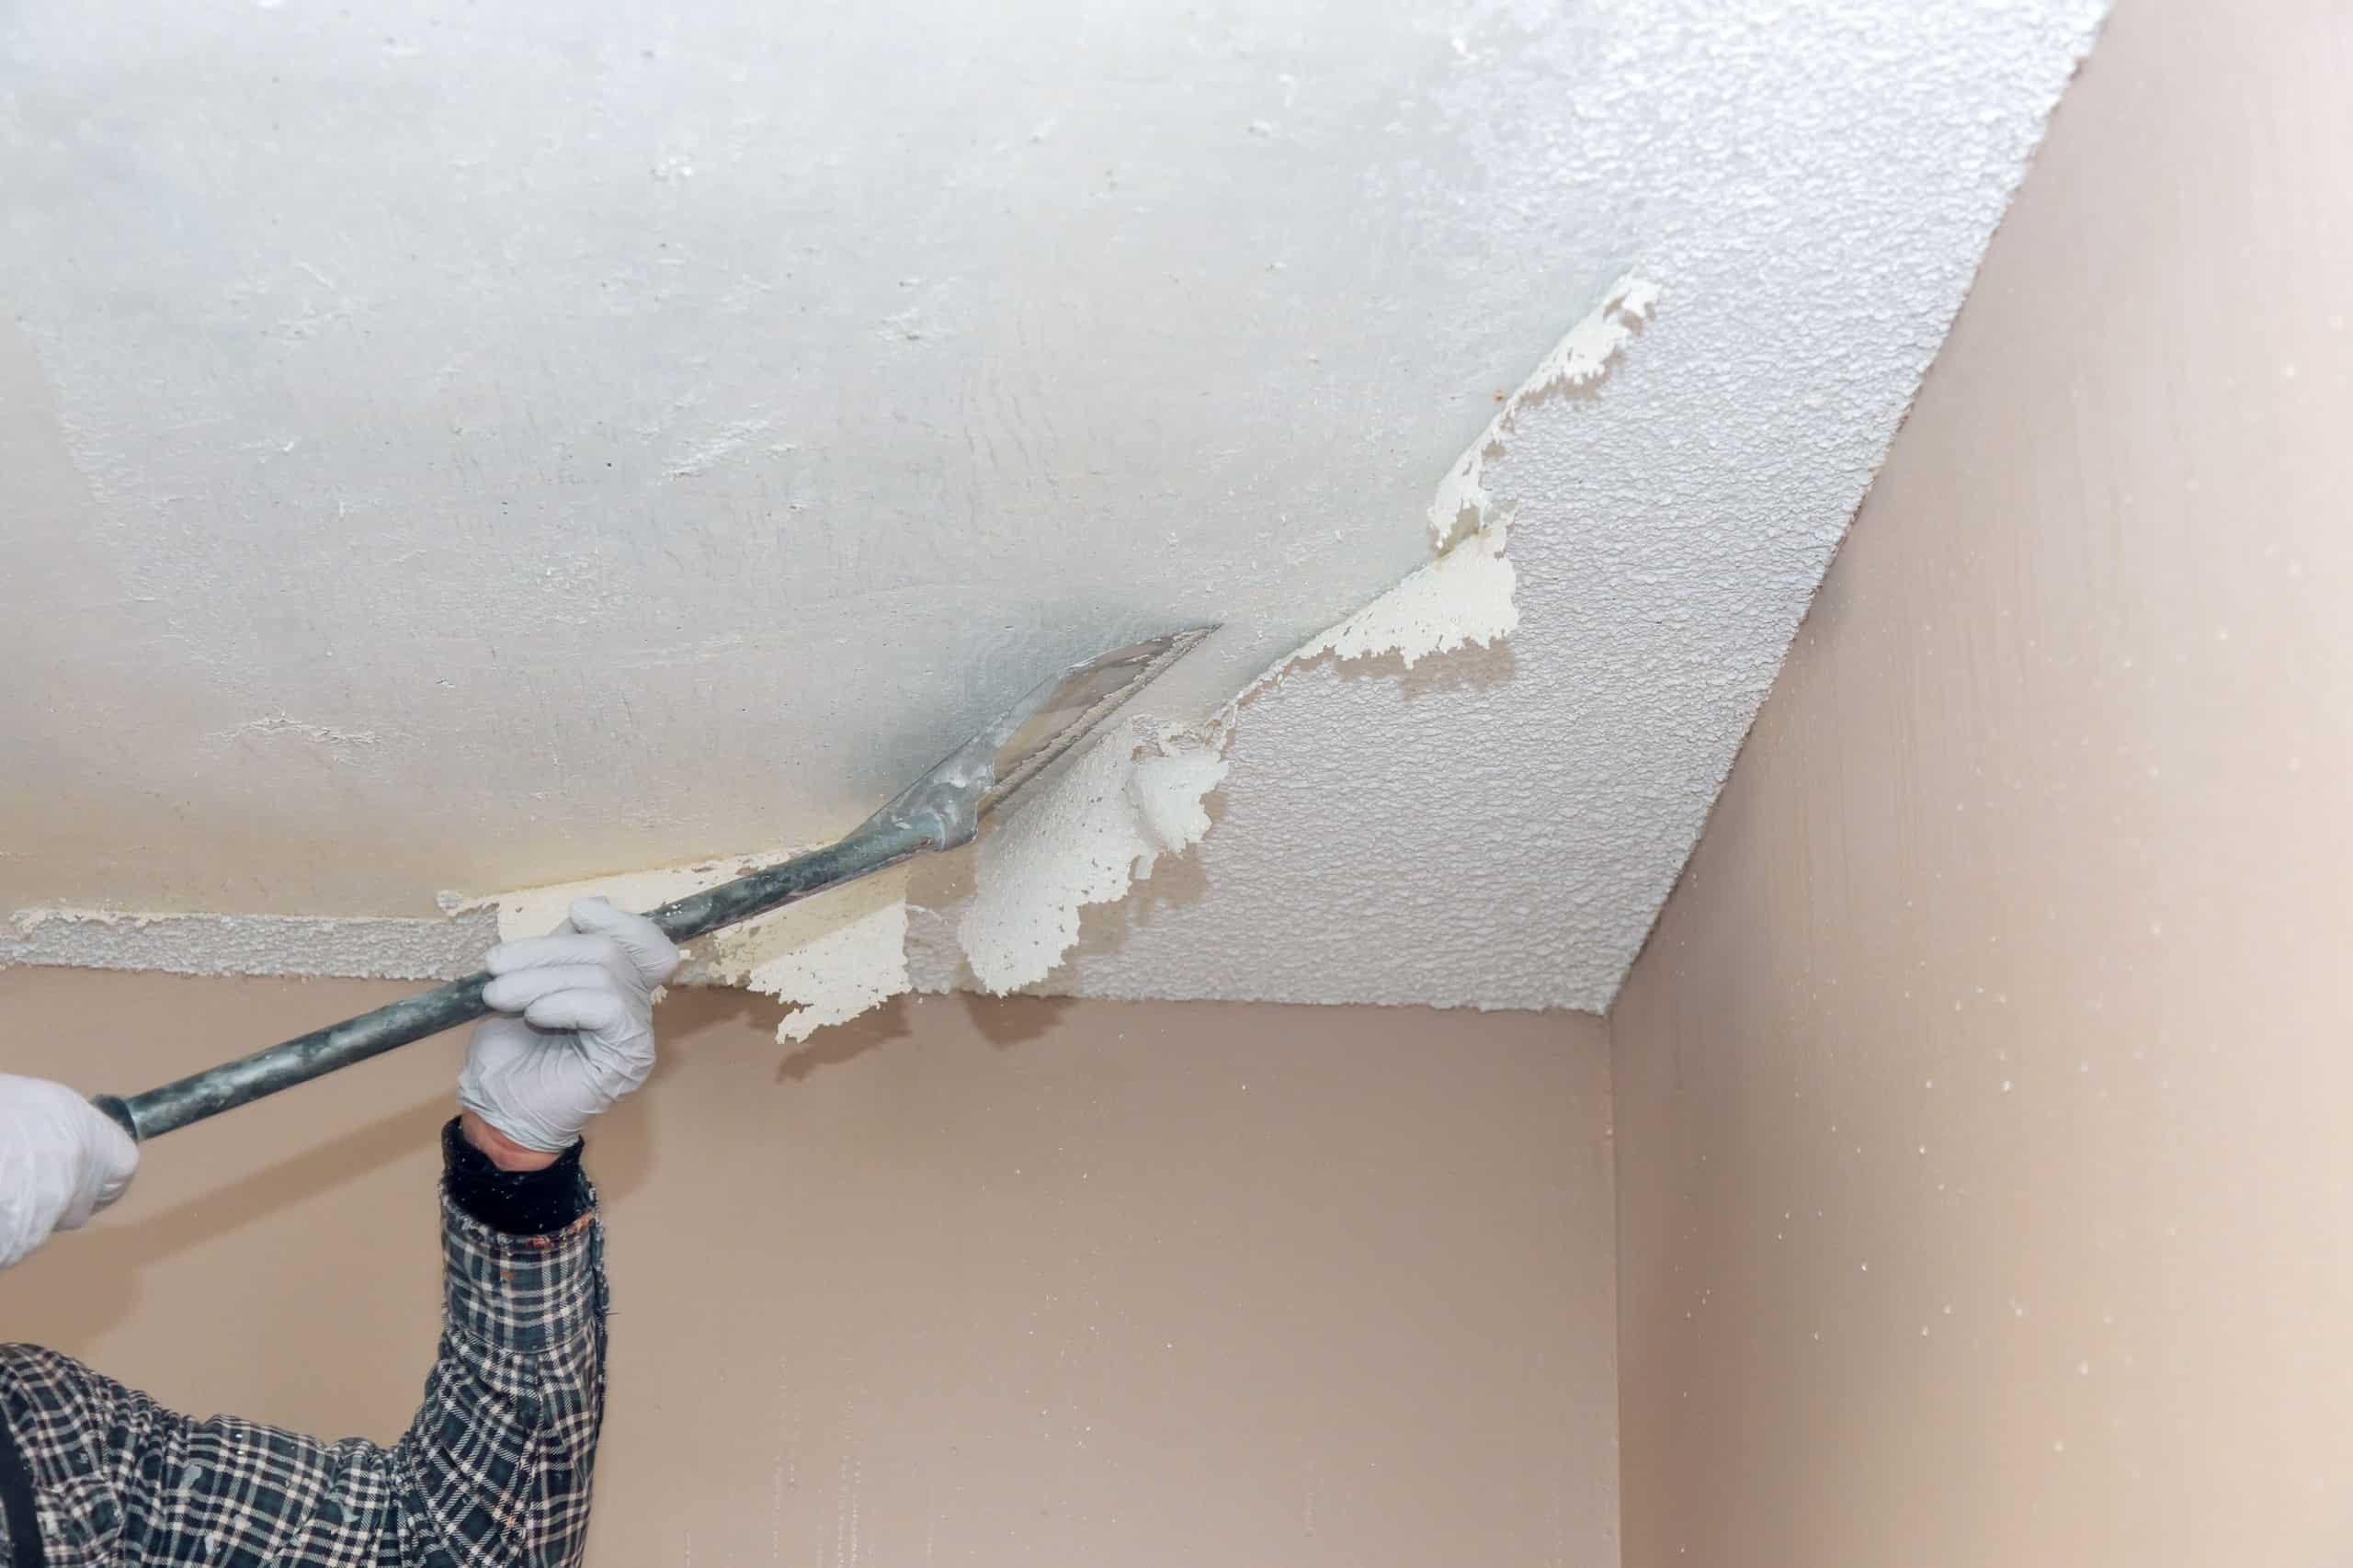
Step 4: Scrape Away the Texture
Now for the fun part (well kind of): scraping off the popcorn texture. Here’s how:
- Use a putty knife or scraper to gently scrape away the wet texture.
- Work in small sections moving across the ceiling systematically.
Be patient and take your time. You don’t want to damage the drywall underneath. If you encounter any stubborn spots reapply the water or remover and let it sit for a bit longer.
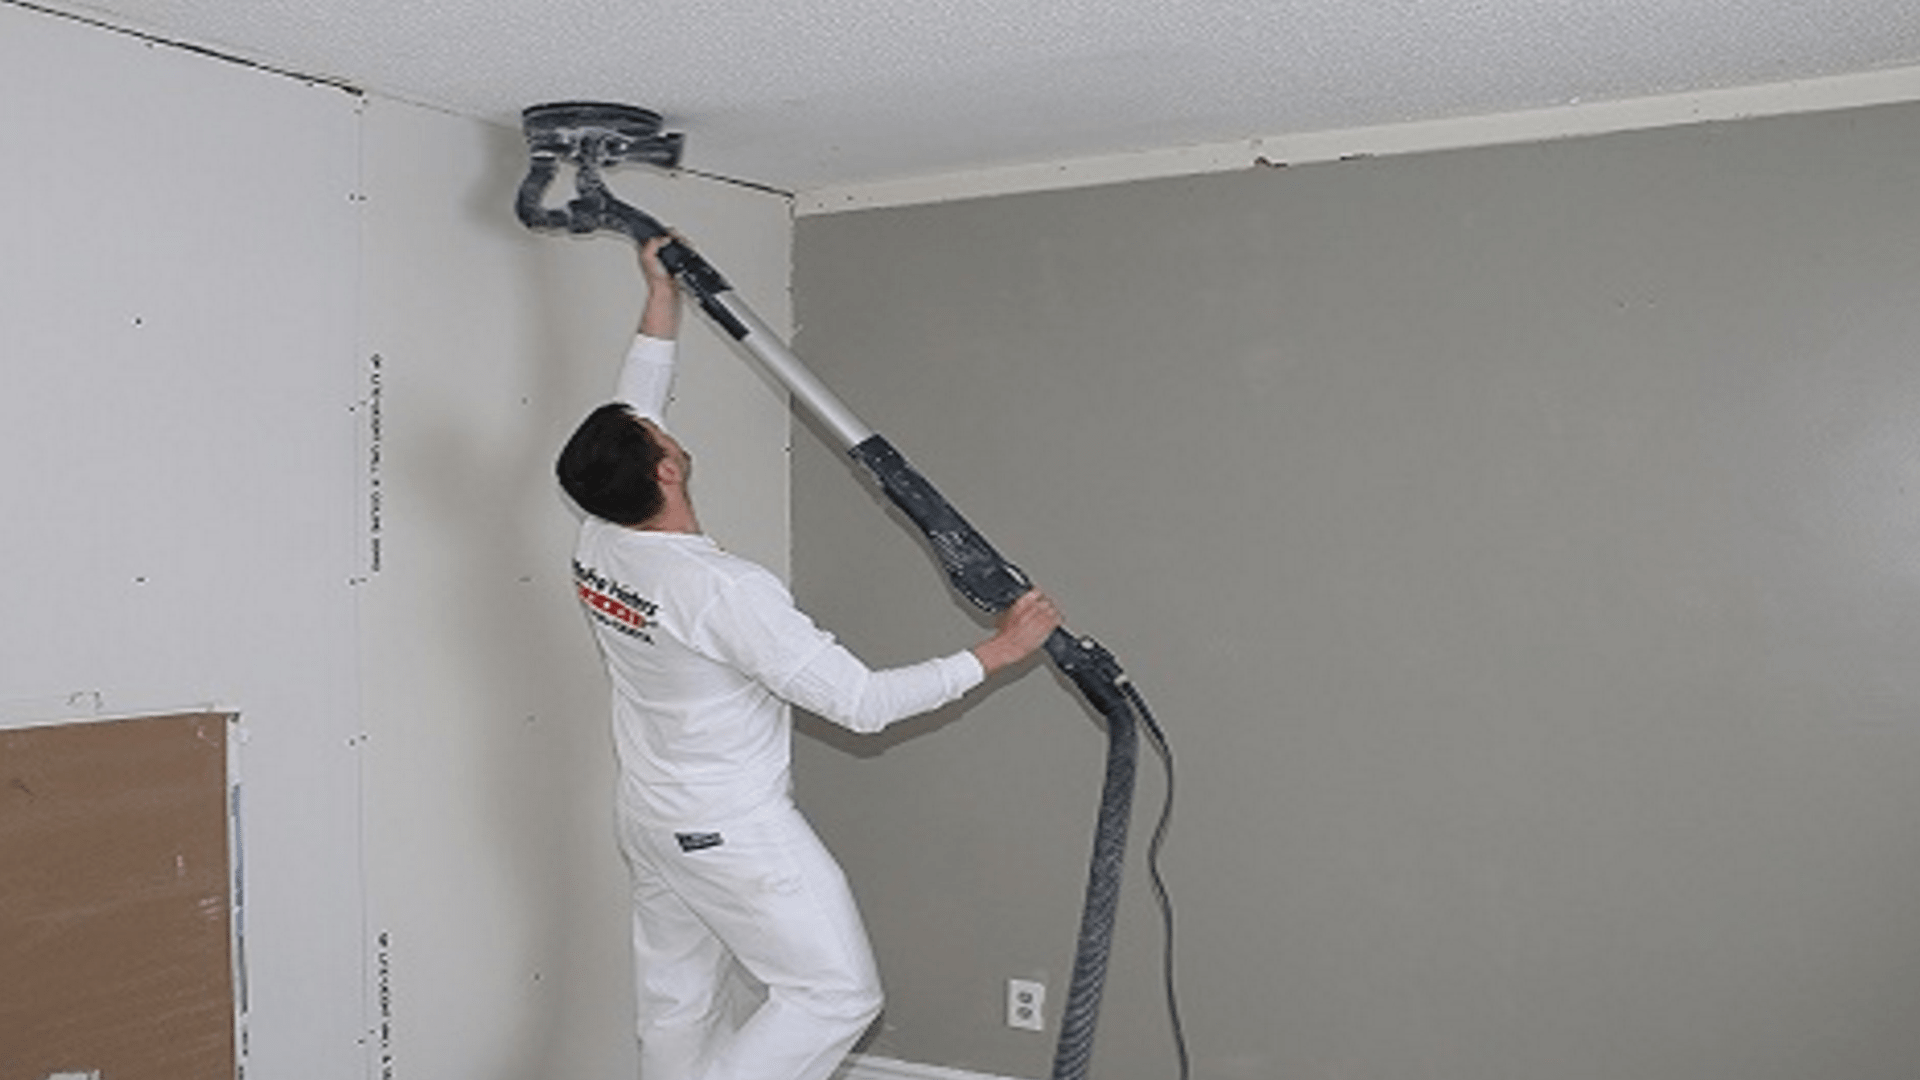
Step 5: Sand the Ceiling
Once you’ve removed all the popcorn texture it’s time to smooth out the ceiling. Here’s how:
- Use a sanding block or pole sander to lightly sand the ceiling.
- Focus on any uneven areas or leftover bits of texture.
Sanding can create a lot of dust so make sure your protective gear is still on point. A smooth ceiling is key to achieving that modern look.
Step 6: Repair and Prime
After sanding you’ll likely have some minor imperfections to fix. Here’s what to do:
- Apply joint compound or drywall mud to any dents or divots.
- Let it dry completely then sand it smooth.
- Prime the entire ceiling to ensure your paint adheres properly.
Priming is essential because it creates a uniform surface for painting. Don’t skip this step or you might end up with uneven paint coverage.
Step 7: Paint the Ceiling
Finally it’s time to give your ceiling a fresh coat of paint. Here’s how:
- Choose a high-quality ceiling paint in the color of your choice.
- Use a roller with an extension pole to paint the ceiling evenly.
- Apply two coats for the best results letting each coat dry completely.
Congratulations! You’ve successfully removed your popcorn ceiling and given your room a modern makeover.
Tips for a Successful Popcorn Ceiling Removal
Now that you know the steps here are a few tips to help you succeed:
- Work in Sections: Don’t try to tackle the entire ceiling at once. Work in small sections to ensure thorough removal.
- Use a Commercial Remover: If water alone isn’t cutting it try a commercial popcorn ceiling remover. It can make the process much easier.
- Stay Patient: Removing popcorn ceilings takes time and patience. Rushing the process can lead to mistakes.
Remember this is a big project so don’t hesitate to ask for help if you need it.
Common Mistakes to Avoid
Even the best DIYers make mistakes. Here are a few to watch out for:
- Skipping the Asbestos Test: Don’t assume your ceiling is asbestos-free. Always test first.
- Over-Saturating the Ceiling: Too much water can damage the drywall. Use a light misting only.
- Not Prepping the Room: Failing to properly cover the floor and furniture can lead to a huge mess.
Avoid these pitfalls and you’ll be good to go.
Cost of Removing Popcorn Ceiling
So how much does it cost to remove a popcorn ceiling? That depends on a few factors:
DIY vs. Professional
- DIY: If you tackle the project yourself you’ll only need to pay for materials which can range from $100 to $300 depending on the size of the room.
- Professional: Hiring a pro can cost anywhere from $1 to $3 per square foot. Prices may vary based on location and the condition of the ceiling.
Consider your budget and skill level when deciding whether to DIY or hire a professional.
Conclusion: Transform Your Space Today
Removing popcorn ceilings can seem intimidating but with the right steps and tools it’s totally doable. Remember to test for asbestos prepare the room properly and take your time. The end result—a sleek modern ceiling—will be worth the effort.
Now it’s your turn. Ready to tackle this project? Leave a comment below and let us know how it goes. And don’t forget to share this article with anyone else who might be thinking about removing their popcorn ceiling. Together we can create spaces that inspire and impress.
Table of Contents
- Why Remove Popcorn Ceiling?
- What You’ll Need to Remove Popcorn Ceiling
- Step-by-Step Guide: How to Remove Popcorn Ceiling
- Tips for a Successful Popcorn Ceiling Removal
- Common Mistakes to Avoid
- Cost of Removing Popcorn Ceiling
